How to embed Power BI visuals in PowerPoint

Joel Monteiro
2019-08-19The recent changes Microsoft introduced to the Power BI API unlocked a lot of potential, and our team was finally able to answer a handful of requests users had been asking for. Sitting atop their most-wanted list was the ability to embed single Power BI visuals in PowerPoint presentations using PowerBI Tiles Pro.
Prior to the last update, users would insert an entire report in a presentation, use PowerPoint’s native crop function, and single out the bit they wanted. Besides not being a very intuitive way to do things, this would not work with the Refresh feature since the visual would completely disappear whenever the user clicked it to update a presentation to the latest data.
Thankfully, after update 3.2.4, it’s far easier to embed single Power BI visuals in PowerPoint and the refresh function works flawlessly. If you haven’t updated to the latest version of PowerBI Tiles Pro yet, click here to download it. If you haven’t tried it yet, you can click here to visit the product’s site and download a free trial.
In this tutorial, we will show you how to embed single Power BI visuals in PowerPoint using PowerBI Tiles Pro, but the same steps can be applied to Word documents and Outlook emails.
Here’s how to add single Power BI visuals to PowerPoint:
Firstly, open your PowerPoint presentation and navigate to the PowerBI Tiles Pro Desktop tab.
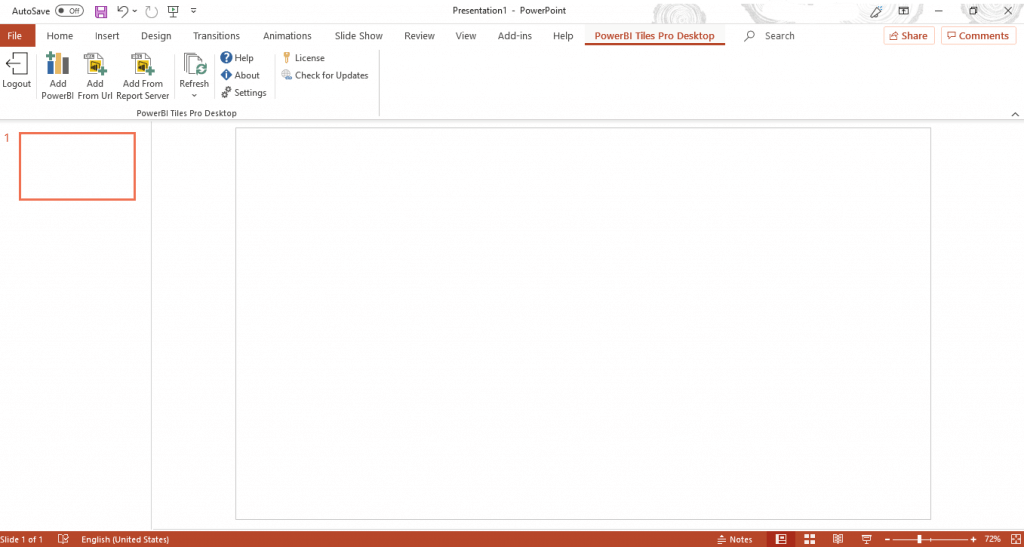
Then, log in to your Power BI account and click Add Power BI to open your workspaces menu.
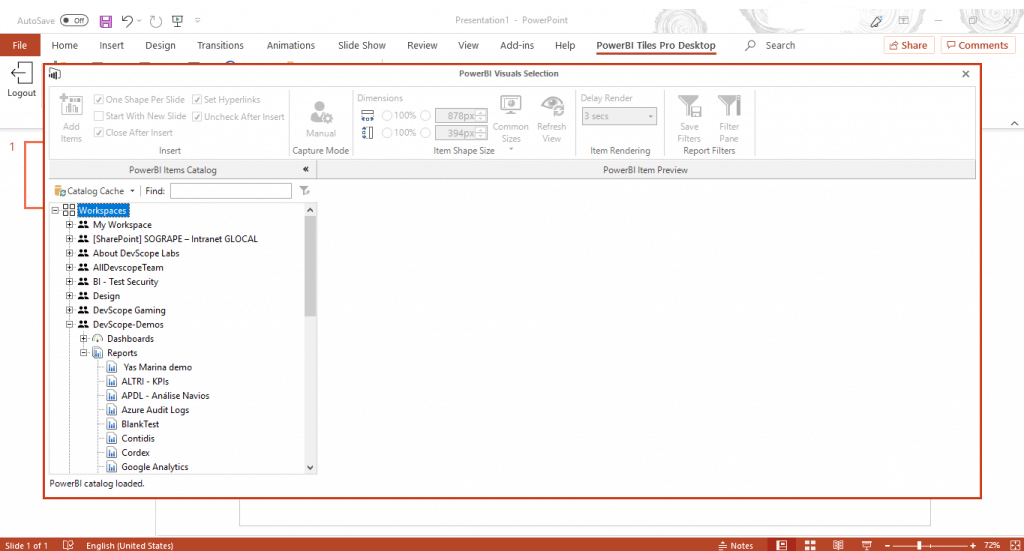
Navigate through your workspaces until you find the report of your choice. Once you click it, you’ll notice that a hierarchy list with each individual visual will unfold below it. If you titled your visuals in Power BI, that will be the name on this list. Otherwise, Power BI will give it a name based on the information it contains.
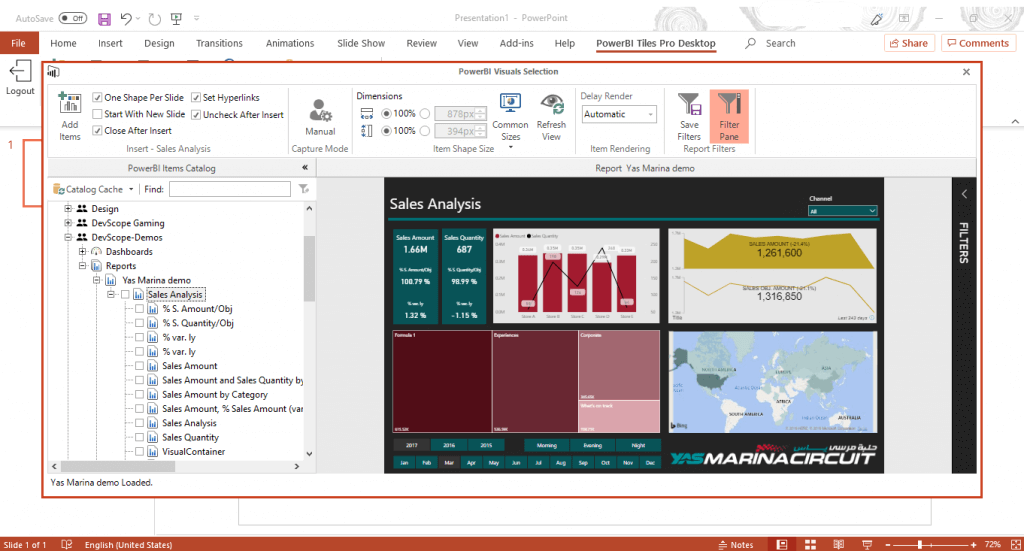
Select the visuals you wish to insert in your presentation and click Add items. Remember that you’re free to use the filters pane on the right.
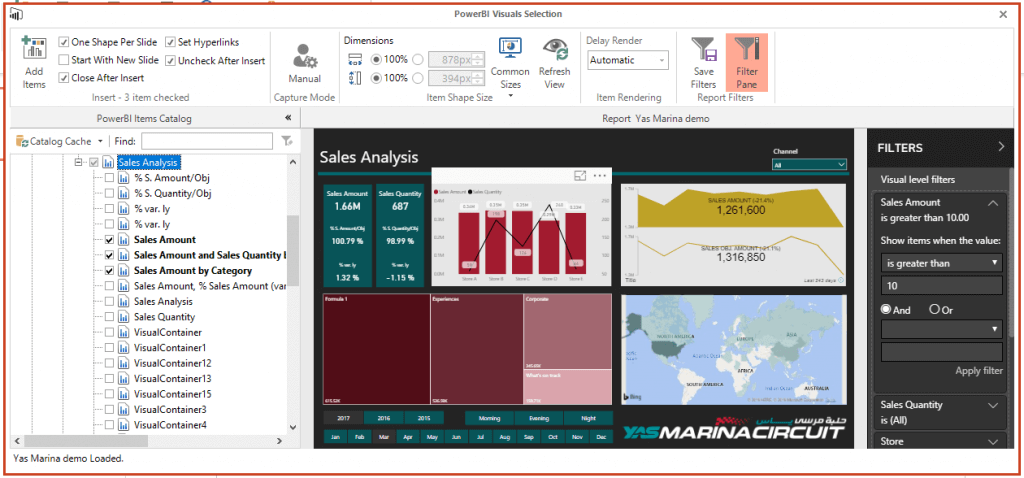
PowerPoint will allocate one slide per visual and adjust it to the slide’s size.
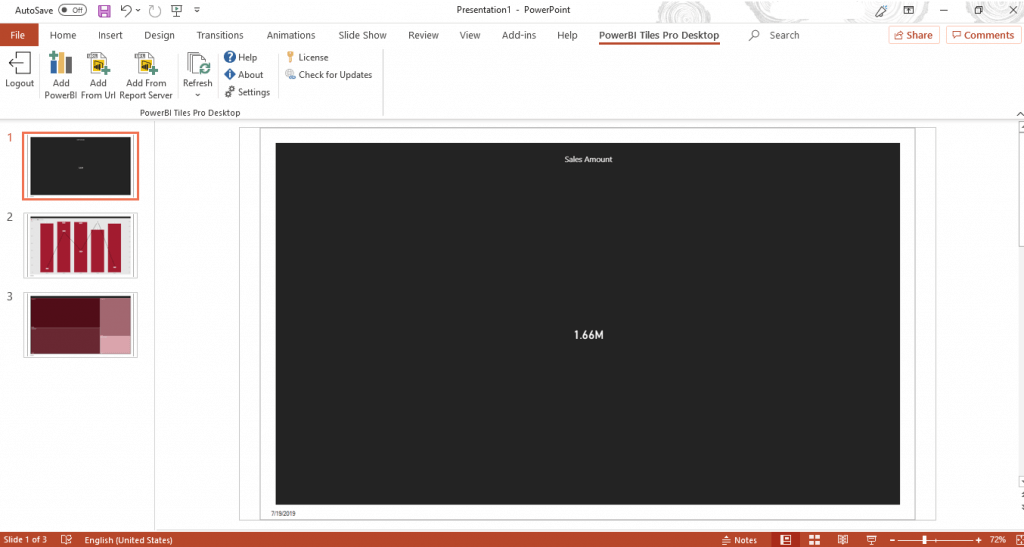
To update the data in your Power BI visuals, all you need to do is click the refresh button from the Power BI Tiles Pro menu. A window will pop up, displaying all available visuals in your presentation. Select the ones you wish to refresh and click Update checked.

If you wish to go “old school” and use PowerPoint’s native crop function on your reports’ screenshot, the latest version of PowerBI Tiles Pro now lets you refresh your data without losing the cropped visual.

Hit the refresh button in a slide with a cropped visual to detect what data can be updated. On the new window, click Update checked, and you’re done.

If you need any help using PowerBI Tiles Pro, please check the product’s 101 guide or contact us by email.

PowerBI Robots 2.2.1: what’s new?
PowerBI Robots 2.2.1 is the latest version of our popular Power BI report automation tool. Click here to learn what's new.

