How to transcribe audio to text with SmartDocumentor Cloud

Joel Monteiro
October 27, 2023In today’s digital age, the need for accurate and efficient transcription services is greater than ever. Whether you’re a journalist, lawyer, content creator, or business professional, transcribing audio and video content can be a time-consuming task. SmartDocumentor Cloud is here to revolutionize the transcription process by harnessing the power of AI with Microsoft Azure Cognitive services’ powerful Speech service to provide highly accurate speech-to-text transcriptions of any audio and video files, saving organizations a tremendous number of hours and energy spent manually transcribing recordings.
In this step-by-step guide, we’ll walk you through the process of using SmartDocumentor Cloud to transcribe audio and video files. Plus, the best part is that you can get started for free with a trial version to experience its capabilities firsthand!
Step 1: Sign Up for a SmartDocumentor Cloud Account
- Visit SmartDocumentor Cloud’s website.
- Look for the blue “Try it now” button and click on it.
- Sign up for an account by filling out the required information (email and password) or using your Microsoft account (your email is the only data we store).
- Follow the verification steps, which may include confirming your email address if you didn’t sign in with a Microsoft account.
- Once your account is verified, you can access SmartDocumentor Cloud.
Step 2: Access the Dashboard
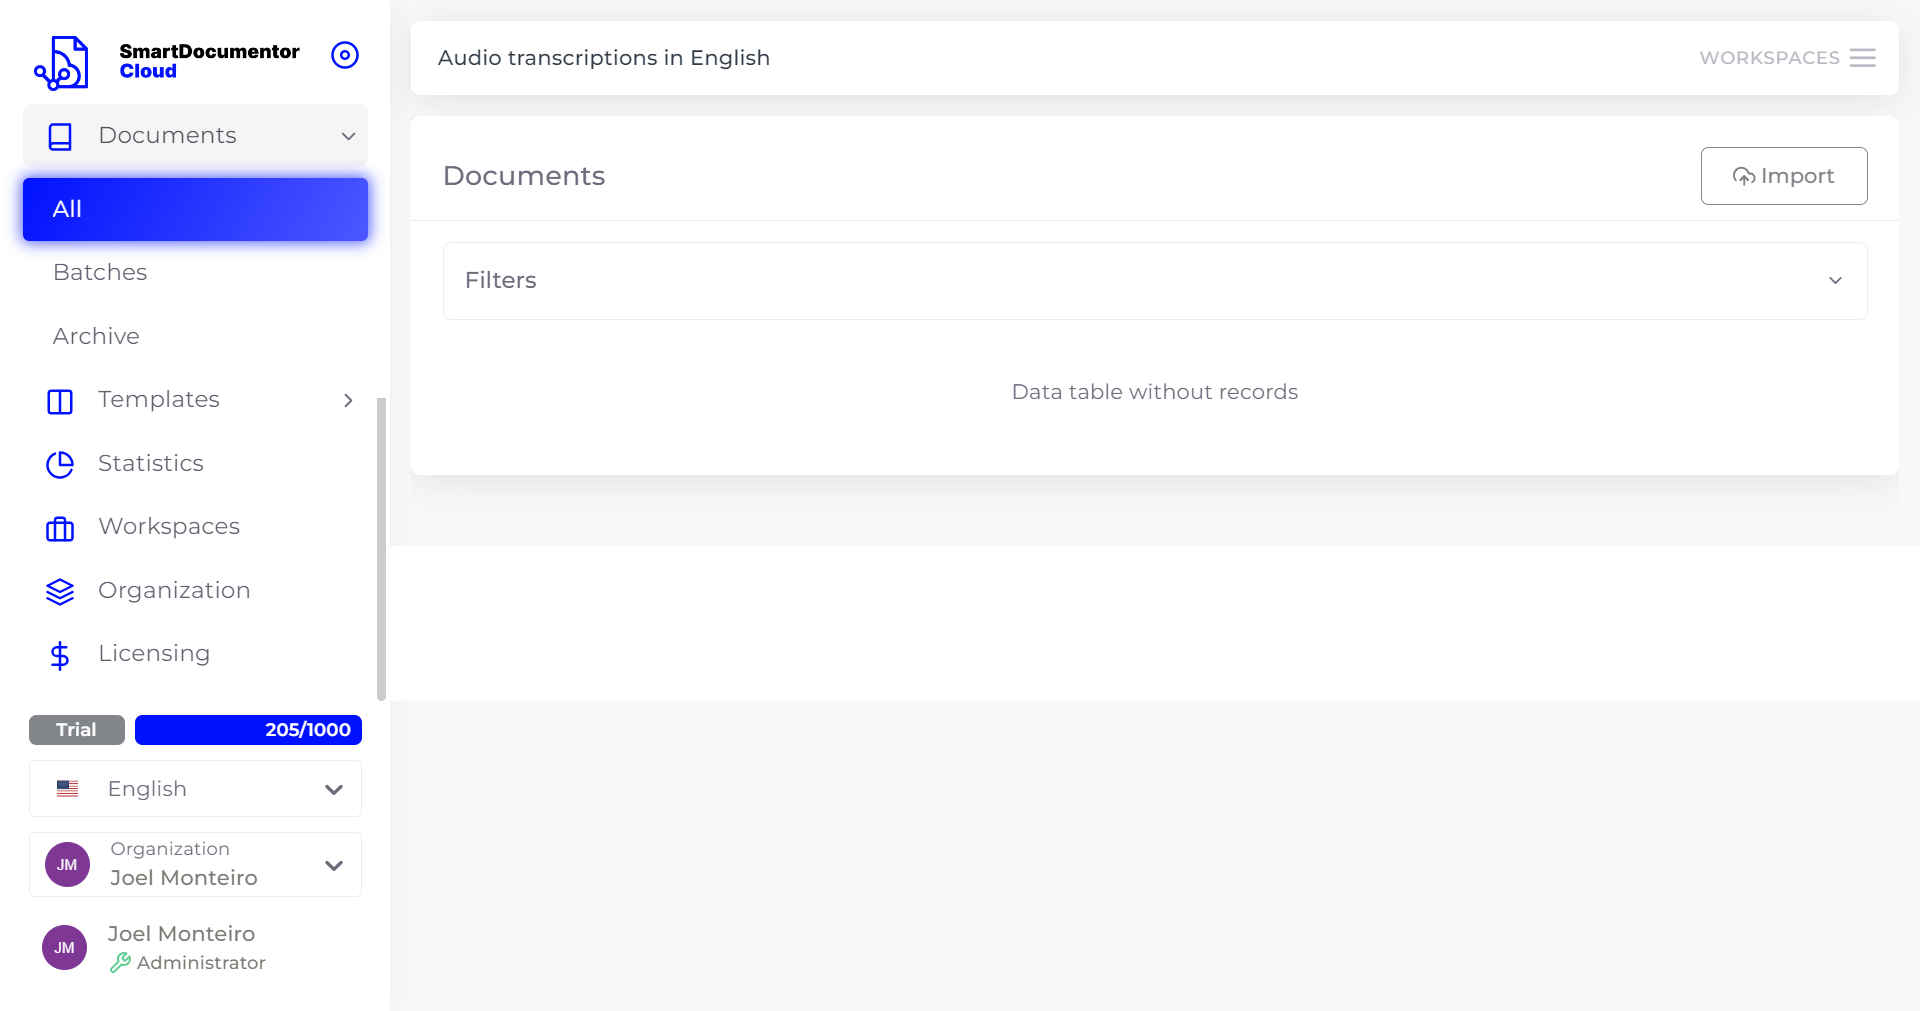
- After logging in, you’ll be directed to the SmartDocumentor Cloud dashboard.
- SmartDocumentor Cloud uses a retracting side menu (by default) which you can pin by clicking the circle next to its logo.
- At the bottom of that side menu, you’ll notice the “Trial” tag next to the number of credits left in your trial account. For audio and video transcriptions, 1 credit = 1 minute of transcribed audio.
- To get started with your transcription, click “Documents” at the top of the menu (it’s also the default option when you access SmartDocumentor Cloud), and then “All”.
Step 3: Create your transcriptions workspace
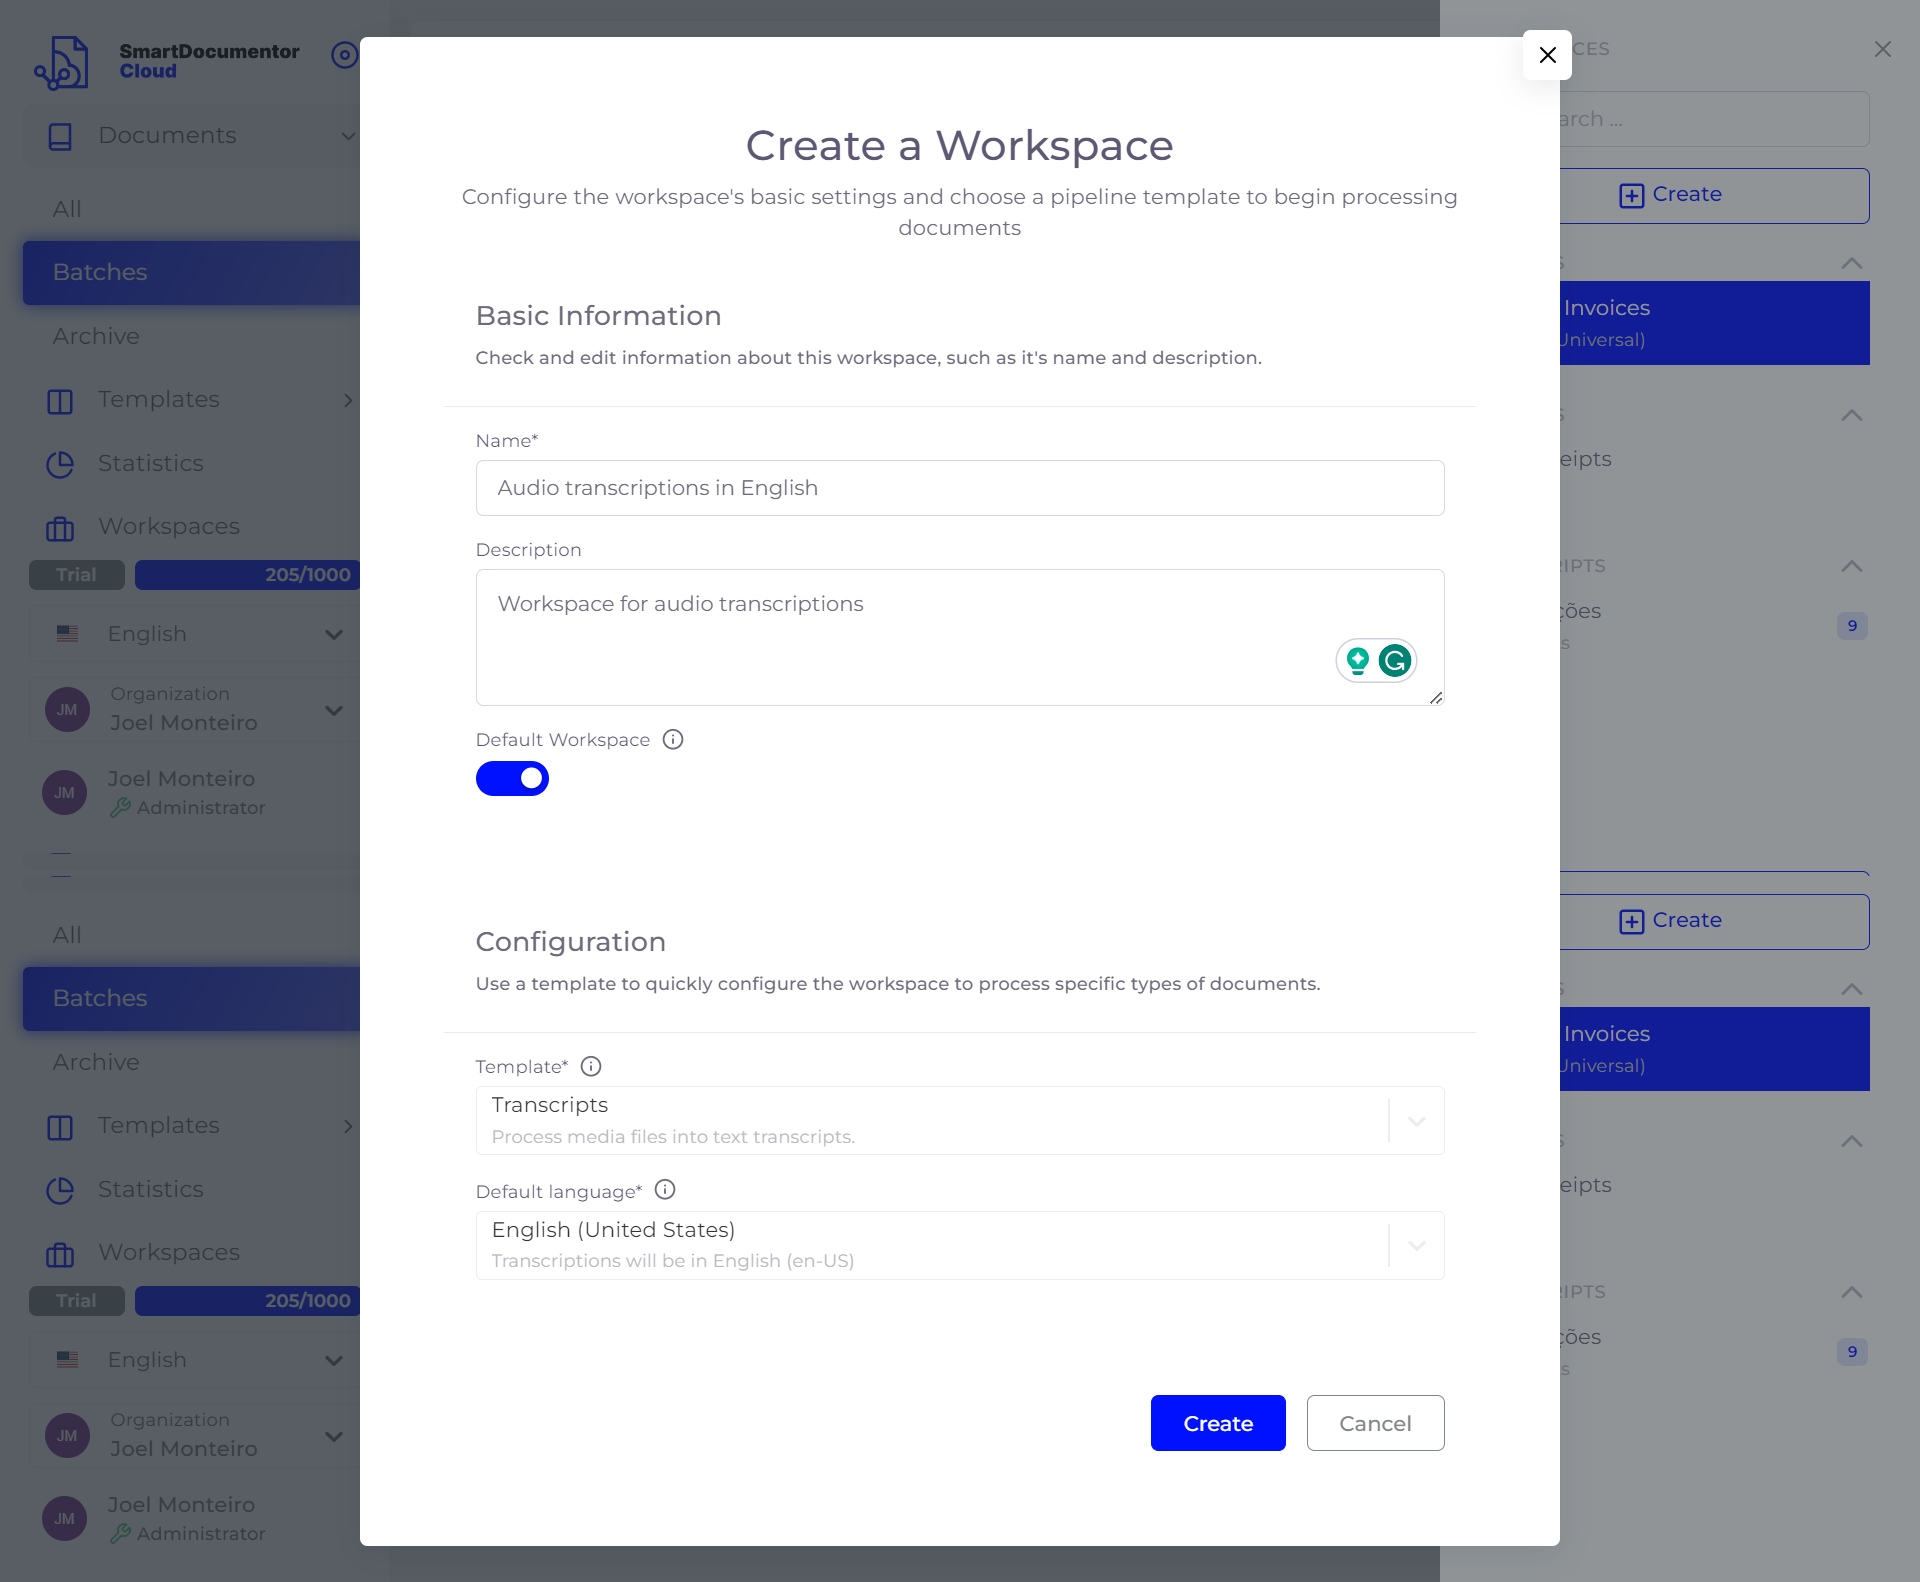
- At the top right corner, click the sandwich Workspaces menu, and then the Create button to open a Create a Workspace modal.
- In this modal, give your workspace a name and, optionally, write a description for it. You can also set it as your default template if you’ll be doing a lot of transcriptions.
- Next, under configuration, select Transcriptions as your default template and pick the language you’ll be working on. SmartDocumentor Cloud currently supports English, French, Spanish, Portuguese, and German, with more languages planned for the near future.
- Finish by clicking “Create”. By default, you’ll be redirected to the workspace you just created.
Step 4: Upload your Audio or Video File
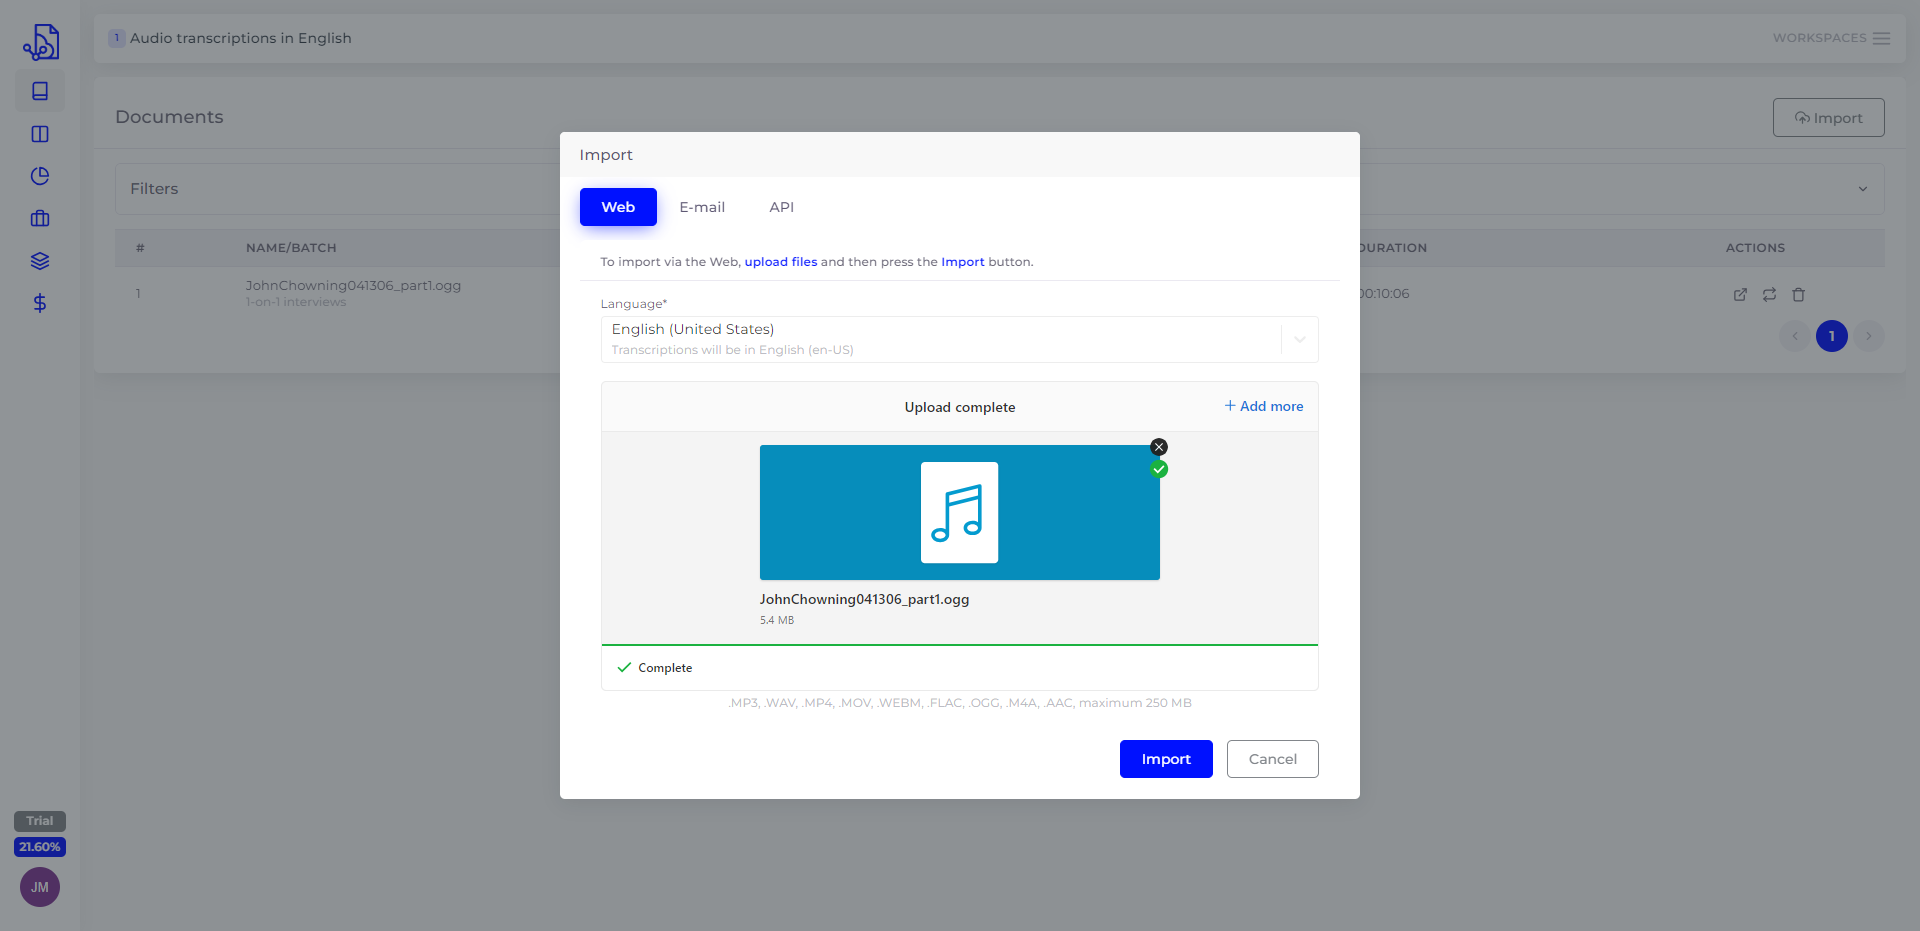
- To get started, click the “Import” button at the top right corner of the screen.
- A modal will pop up prompting you to upload your audio or video file. SmartDocumentor Cloud accepts files up to 250MB in the following formats: .MP3, .WAV, .MP4, .MOV, .WEBM, .FLAC, .OGG, .M4A, .AAC.
- You can upload files to SmartDocumentor Cloud via the web, email, or API. For this tutorial, we’ll only focus on the first option (Web), but feel free to explore the rest, including instructions.
- Select the main language your audio or video file is in to optimize SmartDocumentor Cloud’s capabilities.
- Either drag and drop the files you want to transcribe or click “Browse files” and select the file from your device.
- Wait for the file to upload. The time will depend on the file’s size and your internet connection. You can upload multiple files at once by clicking “Add more”. Once it’s done, click the blue “Import” button.
- You can check the status of the file you just uploaded in the table. It will be there with the status “Queued for processing”, which should immediately change to “Pre-processing in Progress” and then “Recognizing in Process” if you uploaded a single file. Pre-processing might take a few minutes, depending on the length of the audio from your file.
- Once processing is complete, the status will change to “To Review” and you can click the file’s row to open it in the transcription dashboard.
Step 5: Review and edit your transcription
- Once you’re in the transcription dashboard, you’ll be able to rename the file and do some light editing in the transcribed text on the screen as if you were using a text processing tool.
- Review the transcription for accuracy. The AI is powerful, but it’s always a good idea to double-check.
- In the column to your right, you can play the original file and see the text highlighted to help you correct any incorrect bits, should they exist. You can choose multiple playback speeds.
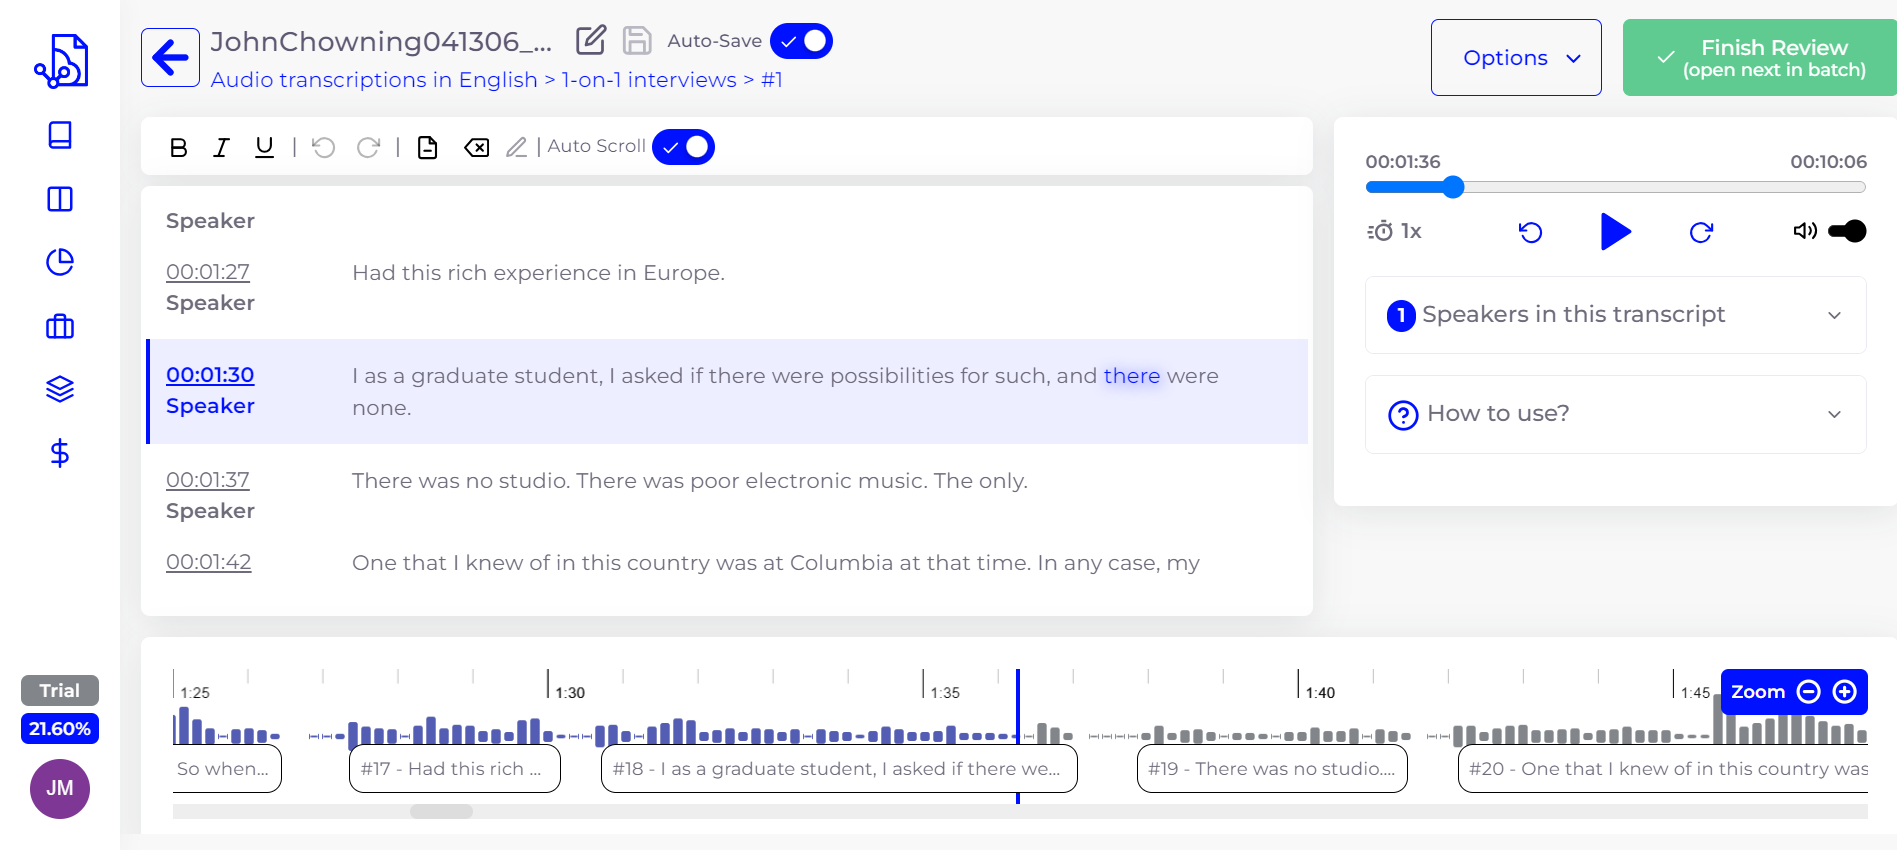
- By dragging the progress bar, the highlighted text will automatically highlight that time in your audio or video file. Conversely, when you click any of the timestamps on the transcription, the video or audio will automatically adjust to it.
- If you click on Speaker in the transcription, you’ll be able to add new speakers or select who is the one speaking at a given point. Our team is working on making this an automatic process.
Step 6: Download and Use Your Transcription
- Once you’re satisfied with the transcription, click the Options dropdown menu, at the top right of the screen and export the transcription as a Microsoft Word (.docx) document.
- You can now use the transcribed text for your desired purpose, whether it’s for a blog post, research, or any other application.
Helpful tools:
In addition to the powerful transcription capabilities of SmartDocumentor Cloud, several complementary tools can enhance your transcription workflow:
- VLC Media Player – an excellent open-source media player that also comes with an audio and video format converter to ensure compatibility with SmartDocumentor Cloud.
- OnlyMP3 – a free online tool that offers a convenient way to download YouTube videos and convert them into audio files like MP3, expanding the range of content you can transcribe.
- Kapwing – can be immensely helpful for splitting lengthy videos into smaller segments, allowing you to get over SmartDocumentor Cloud’s 250MB file size limit.
In conclusion:
SmartDocumentor Cloud is a game-changer for those looking to translate audio and video, using cutting-edge AI technology to save you time and effort. Whether you’re a professional or a hobbyist, this tool streamlines the transcription process, making it more accessible and efficient. With a trial version available, there’s no reason not to give it a try and experience the benefits firsthand and if you need any help, contact our team at [email protected].

Spooktacular Savings: 20% off DevScope products for Halloween!
Halloween is here, and we have a nice treat for our users! Until November 3rd, use code SPOOKY20 to grab our products for 20% off.