How to process invoices and receipts with SmartDocumentor Cloud

Joel Monteiro
April 17, 2024Businesses are always seeking new ways to streamline their processes and increase efficiency. SmartDocumentor Cloud offers a powerful solution for automating the extraction and processing of different types of data, including data from invoices and receipts, saving time, and reducing human error. In this step-by-step guide, we’ll walk you through the process of using the invoices and receipts processing module of SmartDocumentor Cloud.
But before we get started, if you haven’t tried SmartDocumentor Cloud yet, click here to register for free and start your trial. You’ll receive 30 credits which you can use to process up to 30 invoices and receipts.
Step 1: Creating an Invoices processing workspace
All data processing inside SmartDocumentor Cloud happens inside a workspace and each data type requires its own workspace. To learn more about workspaces, read through SmartDocumentor Cloud 101.
1. Once you log into SmartDocumentor Cloud, click the Workspaces sandwich menu at the top right corner of the screen.
2. Click “Create”.
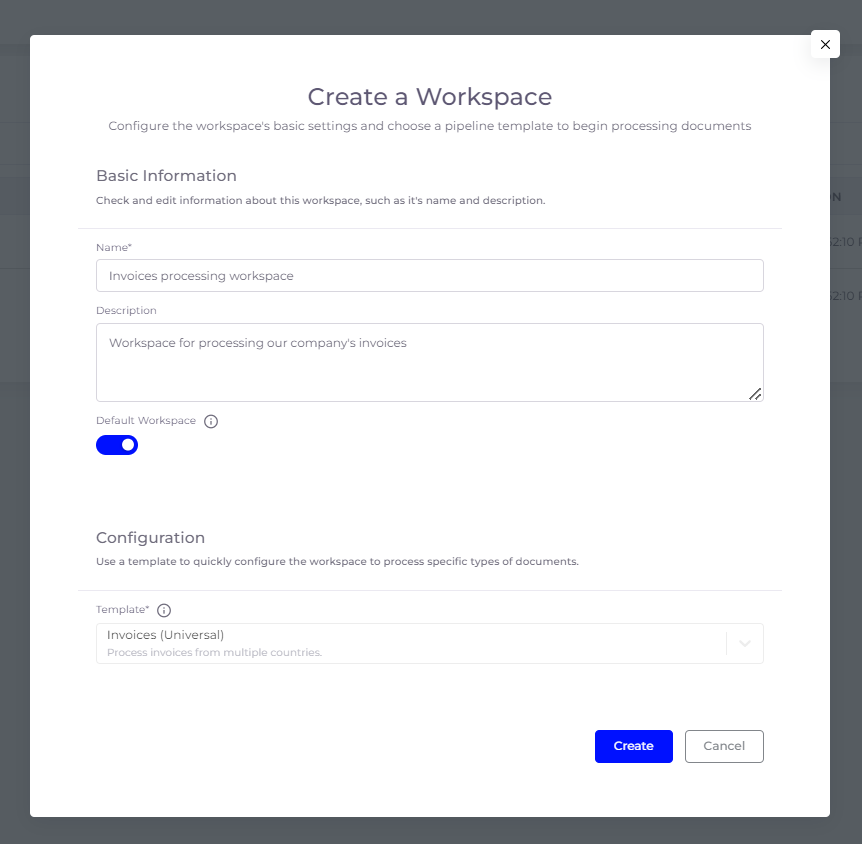
3. A modal will pop up, prompting you to name your workspace (mandatory) and write a description. The first workspace you create in SmartDocumentor Cloud will be automatically set as your default workspace. When you create a new one, you can set it as your default workspace by toggling that option .
4. Next, you must select a template for your workspace. Click Configuration to open the dropdown menu and select Invoices (Universal) from it (if you want to process receipts, there’s that option as well). Note: we are a Portuguese company, so you’ll find Invoices (Portugal) in this list. This option is tailored to the specificities of processing invoices in our country so unless you work in Portugal, you can ignore it. For this tutorial, we are going to process invoices, so let’s pick Invoices (Universal).
5. Finish by clicking “Create”.
Step 2: Adding users to your workspace
SmartDocumentor Cloud is a collaborative platform and if you plan to have multiple colleagues revising your company’s documents, you should add them.
1. Click Workspaces from the menu on the left.
2. Navigate to the “Users” tab.
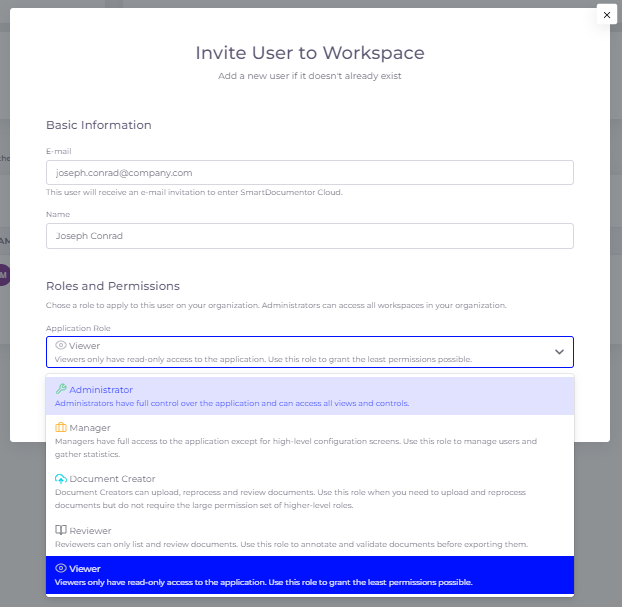
3. Click “Invite user to workspace”.
4. Fill in your colleague’s name and email address.
5. Pick a role from the dropdown menu. Each role’s description is right next to it.
6. Finish by clicking “Invite”.
Step 3: Configuring an export mechanism
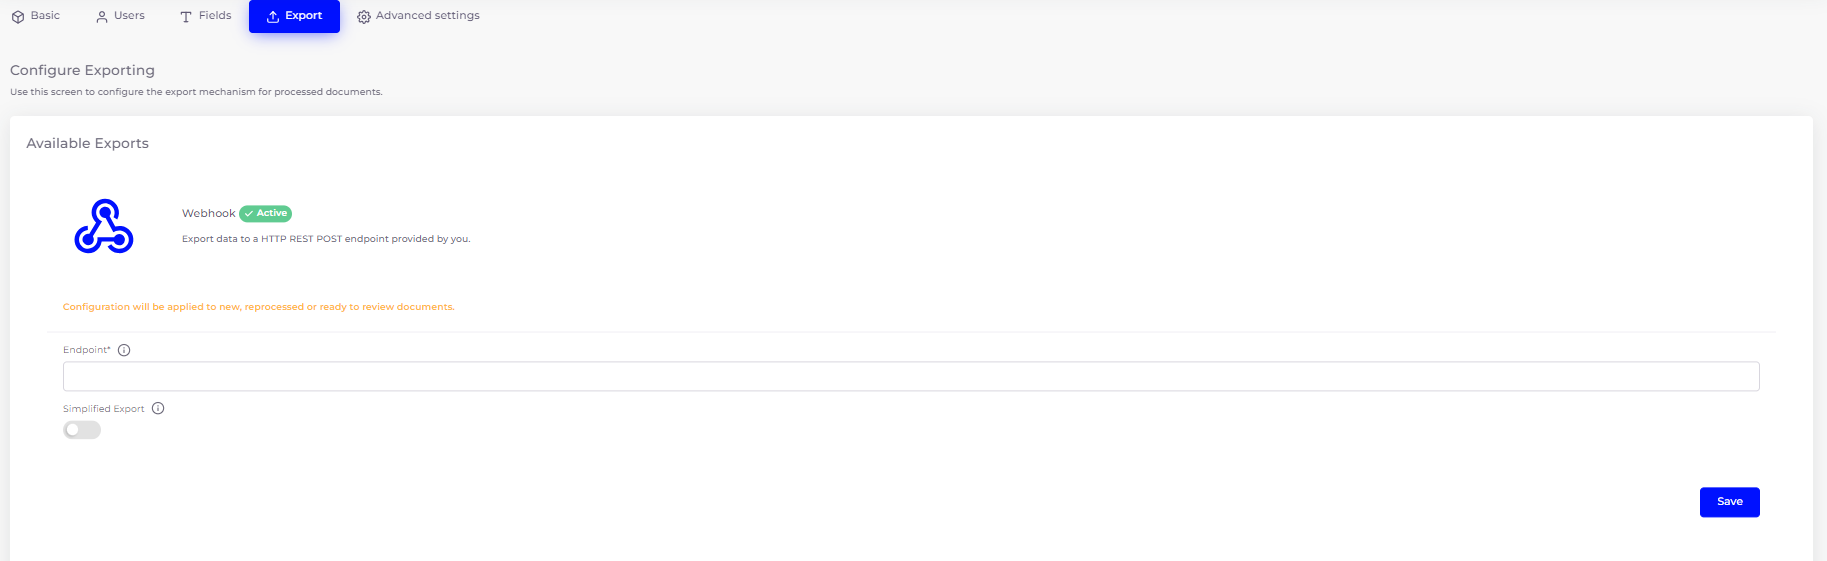
SmartDocumentor Cloud can operate as an end-to-end solution if you configure its import and export endpoints. To do the latter, all you have to do is go to the Export tab in your workspace settings and, under Webhook, paste an endpoint that accepts a HTTP POST request with a JSON payload, and allows anonymous access. Click save to finish.
Step 4: Uploading Documents
After adding your colleagues to the platform, click Documents once more and select either All (if you wish to add individual documents) or Batches (if you wish to add a group of documents that will be grouped as a batch). Since we want to process invoices in this tutorial, let’s click All and upload an invoice.
1. Once you’re inside All (documents), click the Import button. A modal will pop up with 4 import options:
-
- Web – upload files to the web by dragging and dropping them here or browsing your computer.
- URL – if your file is hosted on a public URL or a URL with a generated access token in it, you can paste it here and SmartDocumentor Cloud will retrieve the file.
- Email – send your file as an attachment to the unique email address SmartDocumentor Cloud generated for your company.
- API – connect to SmartDocumentor Cloud via API and have your files automatically uploaded to the platform.
2. If you choose either Web or URL, click Import to upload your file to SmartDocumentor Cloud.
3. SmartDocumentor Cloud processes the file as soon as it’s uploaded. The file will be displayed on a table with one of its columns being Status. Once the Status changes to “To Review”, you can click your file’s line to start the revision process.

Step 5: Revision
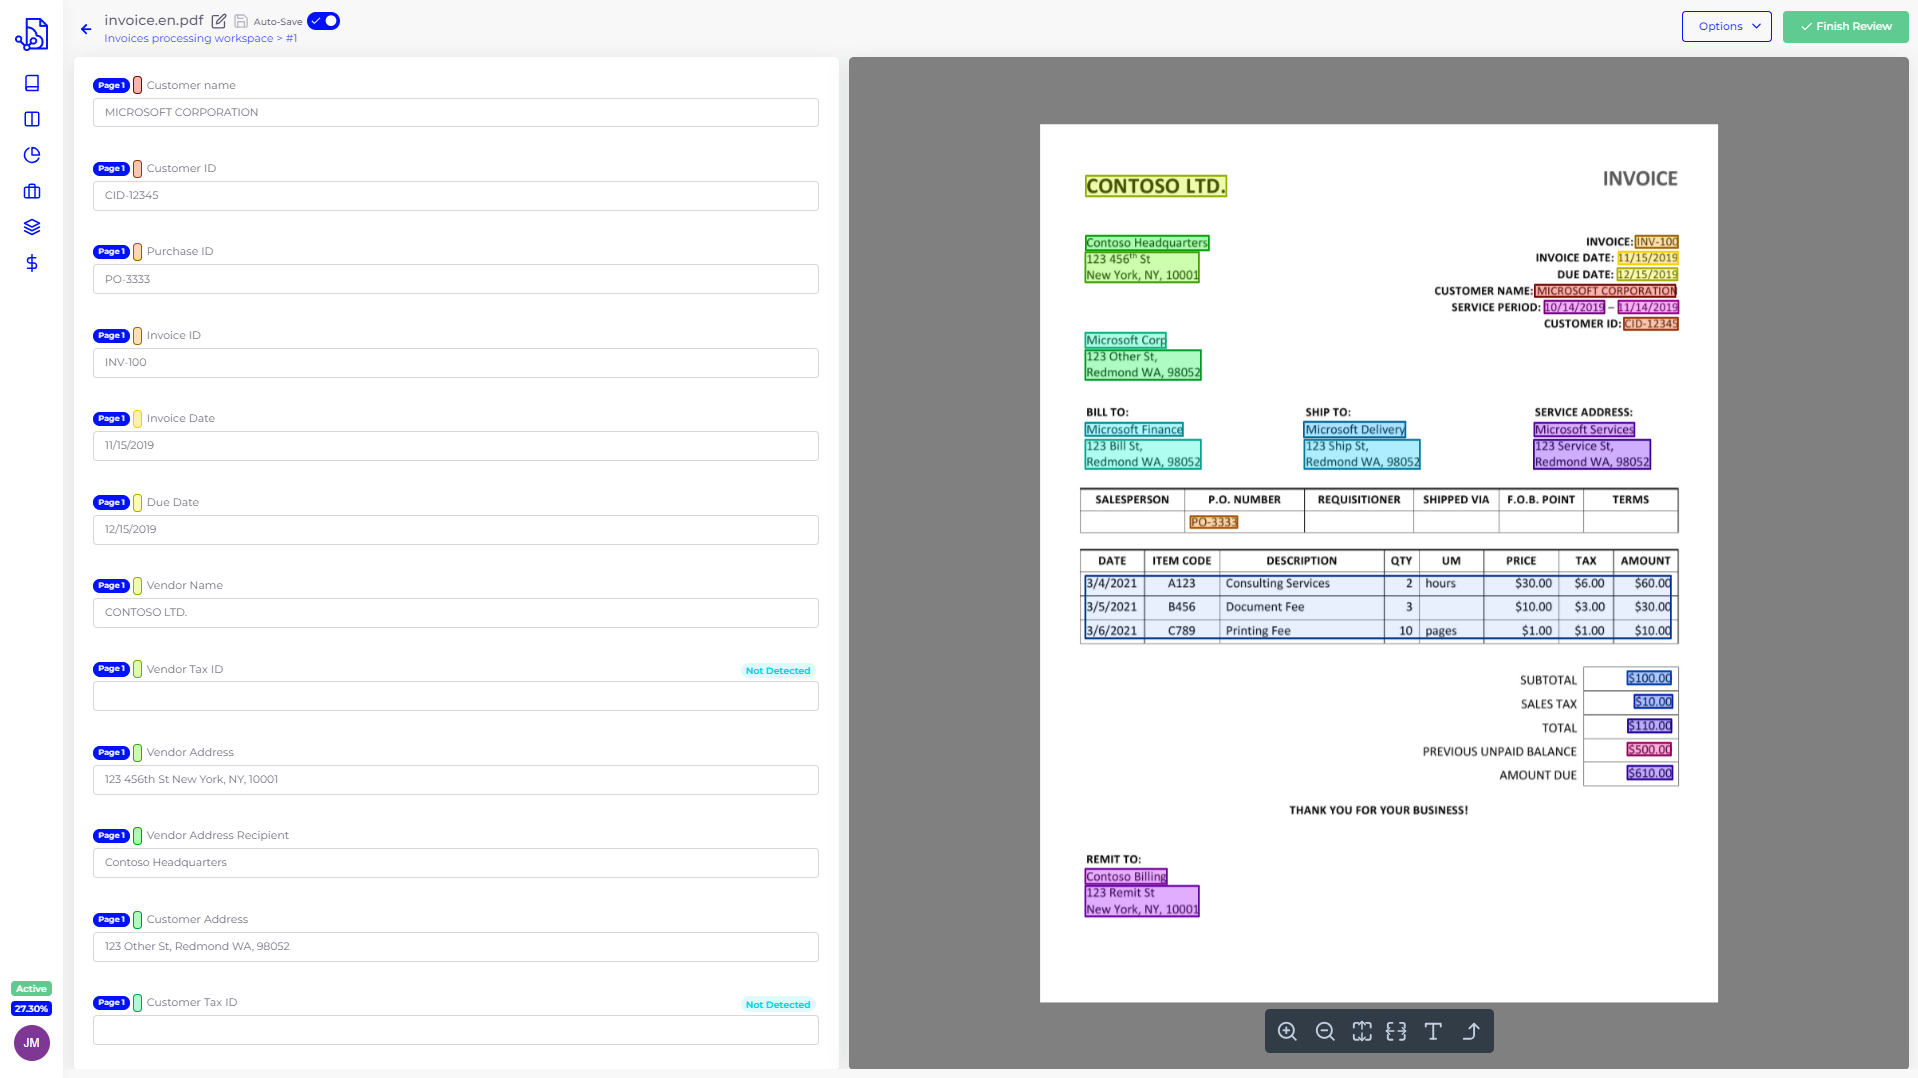
The revision module is composed of two halves: the extracted data and the original document.
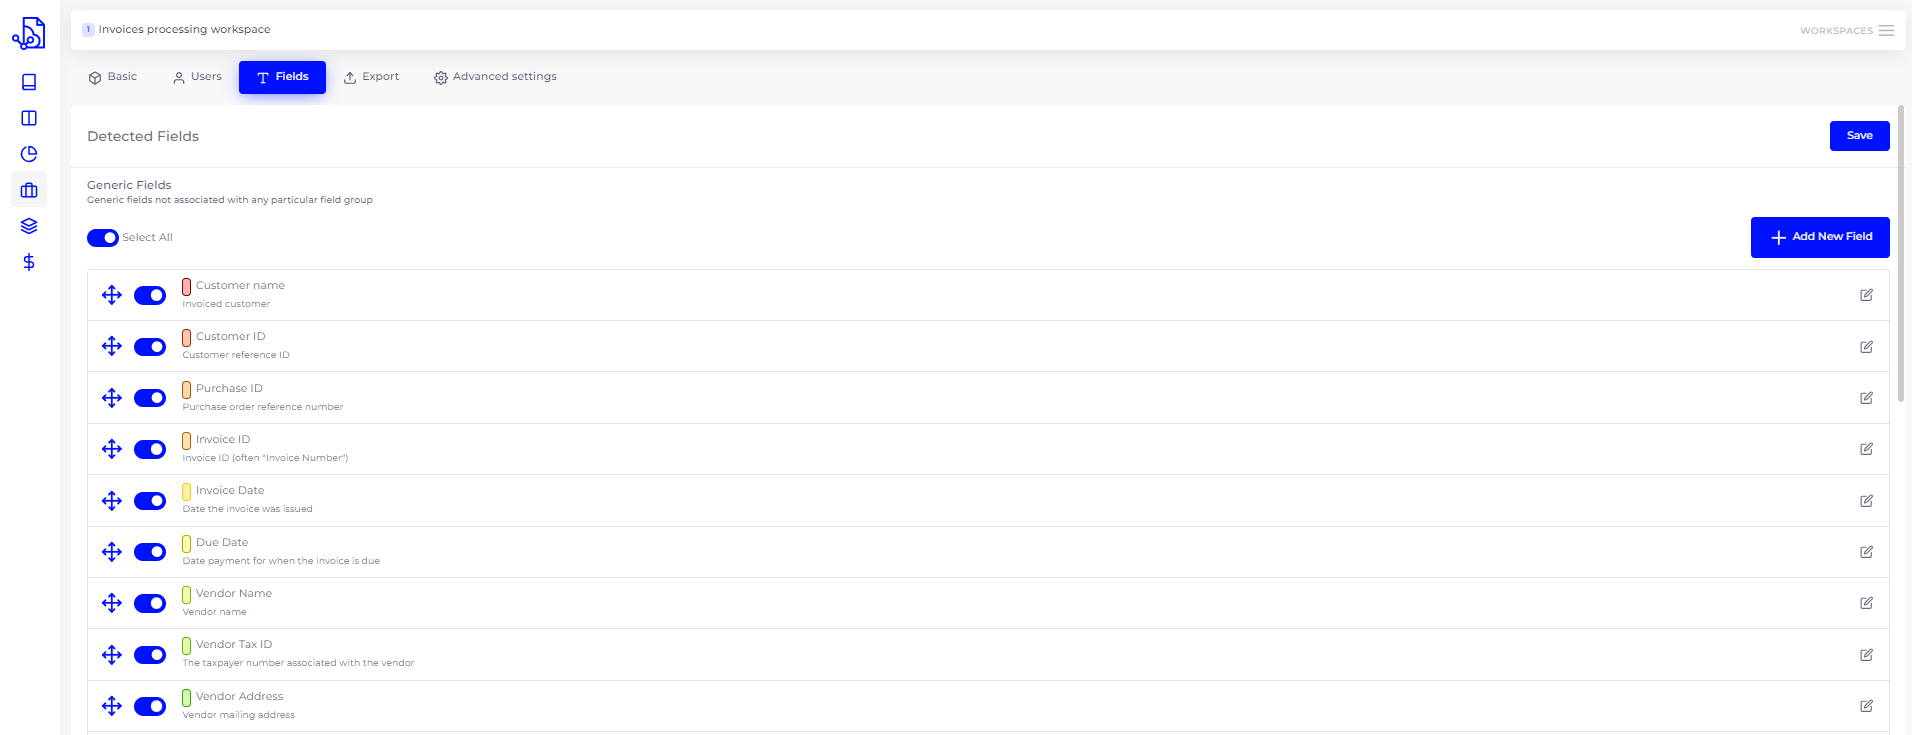
1. As you enter it, you will notice that your original document will have several highlighted fields, corresponding to the fields SmartDocumentor Cloud is trained to detect.
2. You can adjust them to your liking by going to your workspace Settings and clicking the Fields tab . Important note: Changes in the Fields tab will only be applied in future documents. You must reprocess an already processed document if you want SmartDocumentor Cloud to detect new fields in it.
3. Each field in your original document half will correspond to an entry in the extracted data half. By clicking a field on either side, SmartDocumentor Cloud will match it on the other by zooming in or jumping to it.
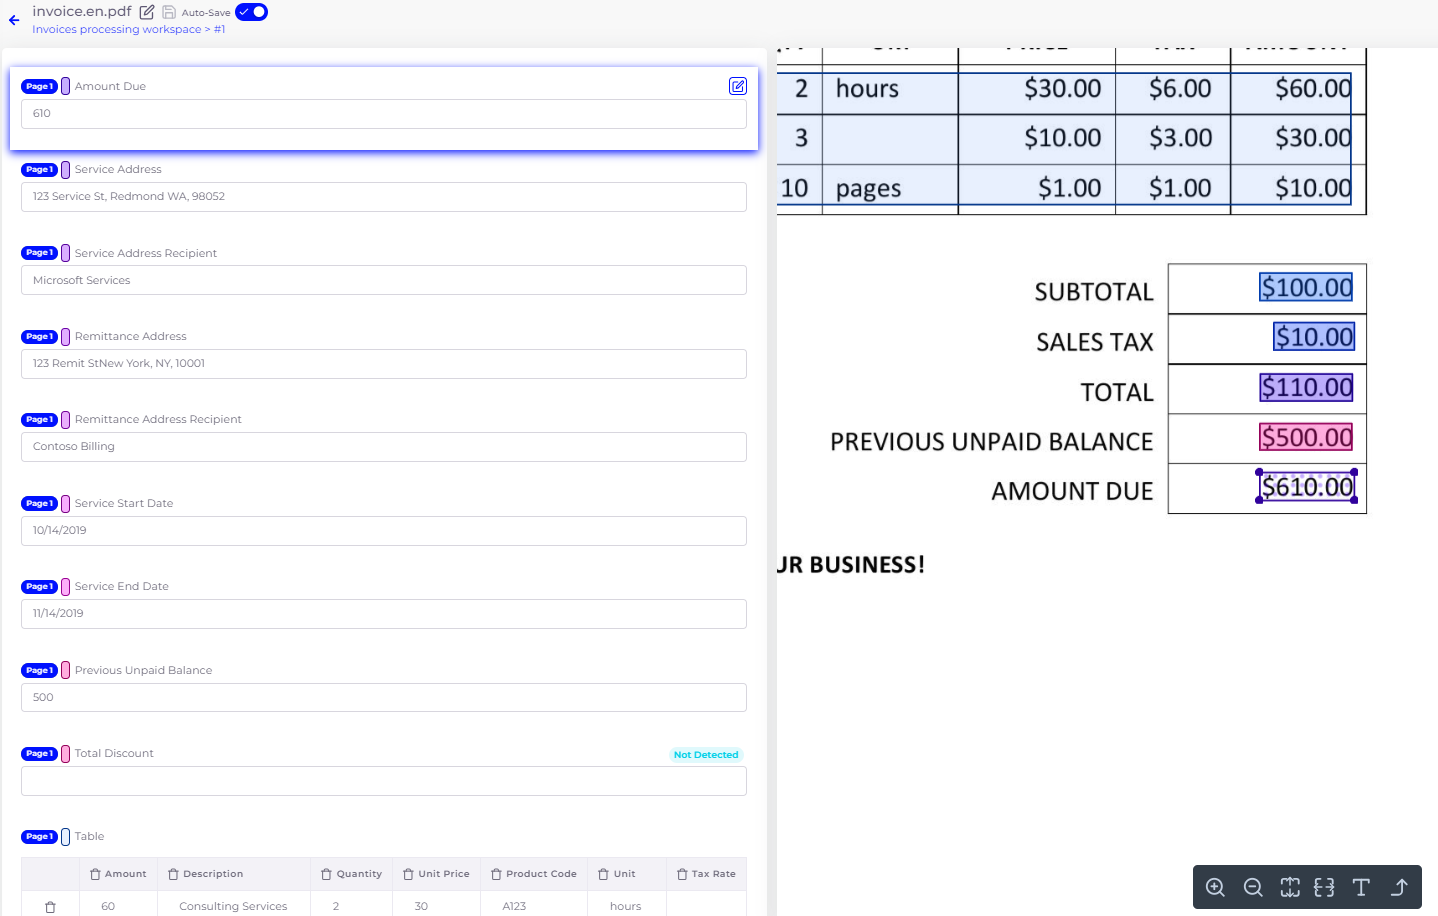
4. Despite being highly accurate, we always advise our clients to go over each value extracted by SmartDocumentor. If you find any extraction mistakes, you can simply click the field on extracted data side and change its value manually.
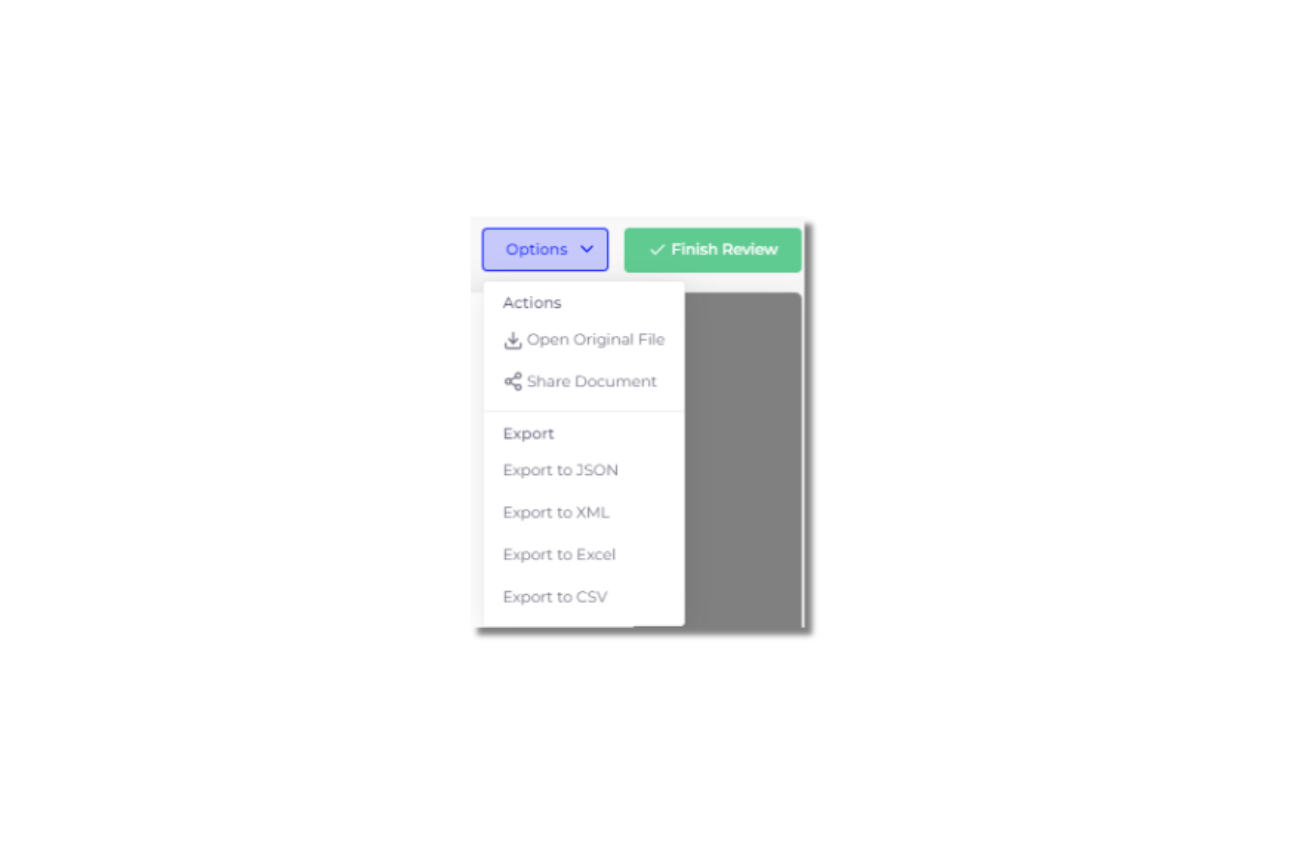
5. Once you’re done reviewing the document, you can click the Options button to export the data in one of the structured and unstructured data formats available or click Finish review to exit the module and archive your document.
Conclusion:
SmartDocumentor Cloud offers a powerful solution for automating the processing of invoices and receipts, saving time, reducing errors, and improving efficiency. We hope our solution is simple enough to use and this step-by-step guide fills in any gaps in the user experience. If you still have any questions about processing invoices and receipts in SmartDocumentor Cloud or run into any errors doing it, get in touch with our team at [email protected].

How to enable MFA (Multi-factor authentication) in PowerBI Portal
Learn how to enable MFA (multi-factor authentication) in PowerBI Portal and add an additional layer of security to the world’s most powerful Power BI rep[...]