Transcribe audio and video to text with SmartDocumentor Cloud

Joel Monteiro
2024-05-03Transcription serves as the cornerstone of effective communication and information management within many organizations, fostering clarity, accessibility, and efficiency across different domains. From meetings and interviews to customer interactions and legal proceedings, the conversion of spoken content into written text not only preserves valuable insights but also enhances collaboration, decision-making, and compliance efforts. In an era where information overload is prevalent, the ability to accurately transcribe audio and video empowers organizations to capture, organize, and leverage vital data, ultimately driving productivity, innovation, and strategic growth initiatives. In this step-by-step guide, we’ll walk you through the process of using SmartDocumentor Cloud to transcribe audio and video files to text.
But before we get started, if you haven’t tried SmartDocumentor Cloud yet, click here to register for free and start your trial. You’ll receive 30 credits which you can use to transcribe up to 30 minutes of audio and video.
Step 1: Creating a transcription workspace
All data processing inside SmartDocumentor Cloud happens inside a workspace and each data type requires its own workspace. To learn more about workspaces, read through SmartDocumentor Cloud 101.
1. Once you log into SmartDocumentor Cloud, click the Workspaces sandwich menu at the top right corner of the screen.
2. Click “Create”.
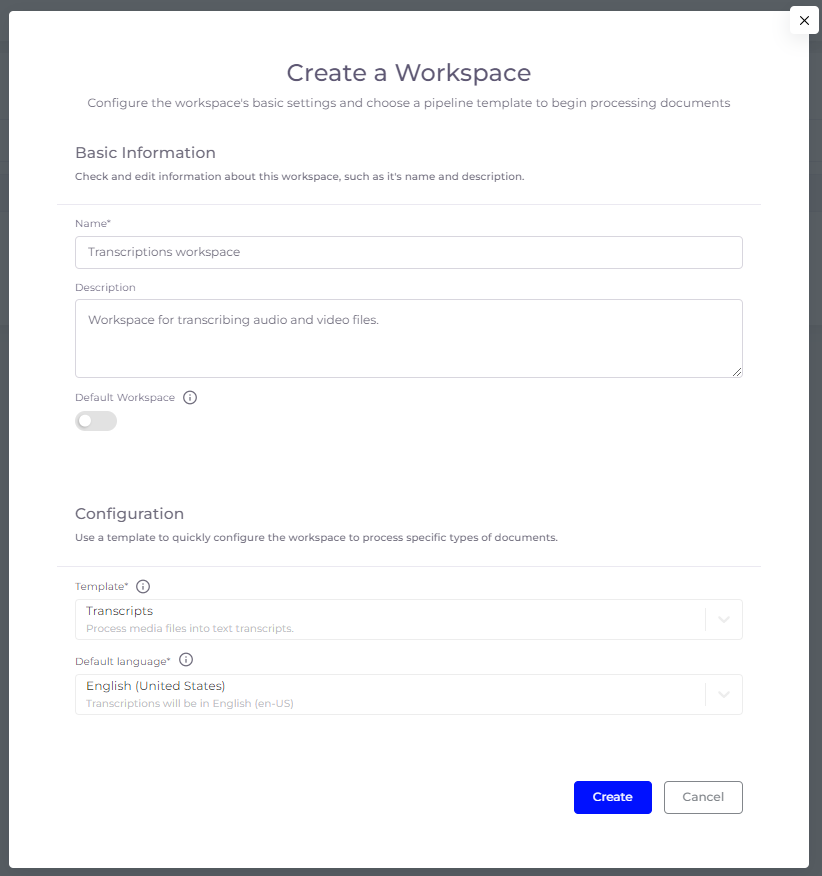
3. A modal will pop up, prompting you to name your workspace (mandatory) and write a description. The first workspace you create in SmartDocumentor Cloud will be automatically set as your default workspace. When you create a new one, you can set it as your default workspace by toggling that option .
4. Next, you must select a template for your workspace. Click Configuration to open the dropdown menu and select “Transcripts” since we are going to transcribe an audio file in this tutorial.
5. Finish by clicking “Create”.
Step 2: Adding users to your workspace
SmartDocumentor Cloud is a collaborative platform and if you plan to have multiple colleagues revising your company’s documents, you should add them.
1. Click Workspaces from the menu on the left.
2. Navigate to the “Users” tab.
3. Click “Invite user to workspace”.
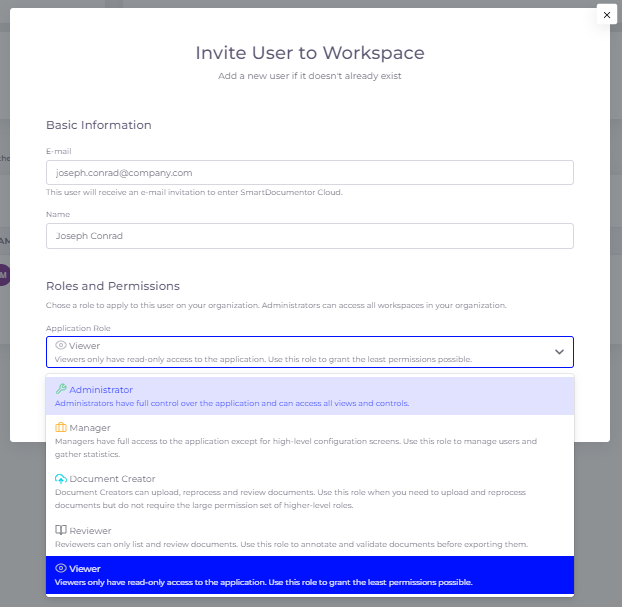
4. Fill in your colleague’s name and email address.
5. Pick a role from the dropdown menu. Each role’s description is right next to it.
6. Finish by clicking “Invite”.
Step 3: Configuring an export mechanism
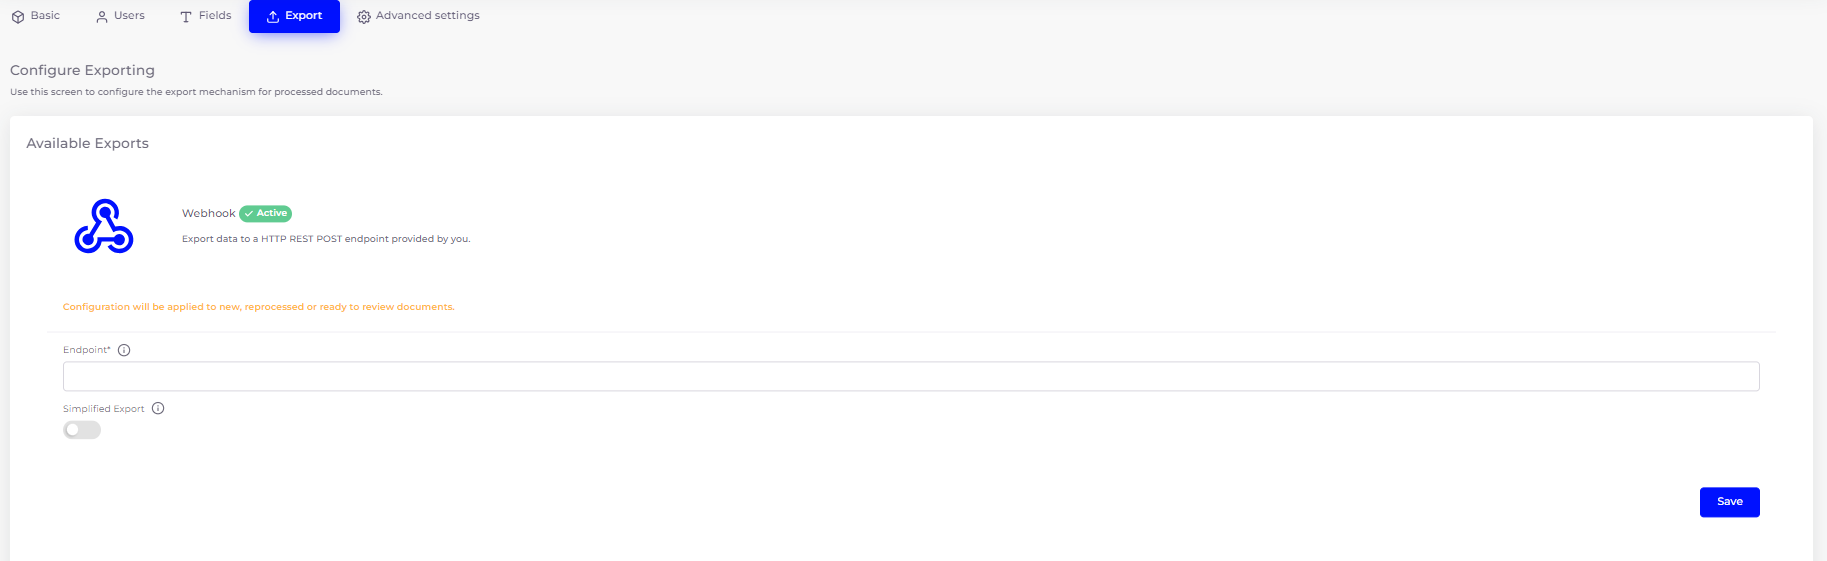
SmartDocumentor Cloud can operate as an end-to-end solution if you configure its import and export endpoints. To do the latter, all you have to do is go to the Export tab in your workspace settings and, under Webhook, paste an endpoint that accepts a HTTP POST request with a JSON payload, and allows anonymous access. Click save to finish.
Step 4: Uploading audio and video files
After adding your colleagues to the platform, click Documents once more and select either All (if you wish to add individual files to transcribe) or Batches (if you wish to add a group of files that will be grouped as a batch). For this tutorial, we want to transcribe an audio file, so we will click All.
1. Once you’re inside All (documents), click the Import button. A modal will pop up with 4 import options:
-
- Web – upload files to the web by dragging and dropping them here or browsing your computer. The supported file formats in SmartDocumentor Cloud are .MP3, .WMA, .WAV, .MP4, .MOV, .WEBM, .FLAC, .OGG, .M4A and .AAC. SmartDocumentor Cloud offers the ability to split your uploaded files into smaller, easier to review portions. You can use this feature by toggling the “Split into smaller documents” and set the maximum time of each. With that being said, the files you upload shouldn’t have a size exceeding 250 MB. If you need to split your audio and video files to meet this size requirement, we recommend you use Microsoft Clipchamp.
- URL – if your file is hosted on a public URL or a URL with a generated access token in it, you can paste it here and SmartDocumentor Cloud will retrieve the file.
- Email – send your file as an attachment to the unique email address SmartDocumentor Cloud generated for your company.
- API – connect to SmartDocumentor Cloud via API and have your files automatically uploaded to the platform.
2. If you choose either Web or URL, click Import to upload your file to SmartDocumentor Cloud.
SmartDocumentor Cloud processes the file as soon as it’s uploaded. The file will be displayed on a table with one of its columns being Status. Once the Status changes to “To Review”, you can click your file’s line to start the revision process.

Step 5: Revision
The revision module is composed of 3 parts: the transcribed text with timestamps to your left, a player where you can play the original audio or video file to your right, and a progression bar at the bottom of the screen.
1. You can review the transcribed text with or without playing your audio or video file. If you choose the latter and have “Auto Scroll” enabled, SmartDocumentor Cloud will highlight the paragraph and the word currently being spoken.
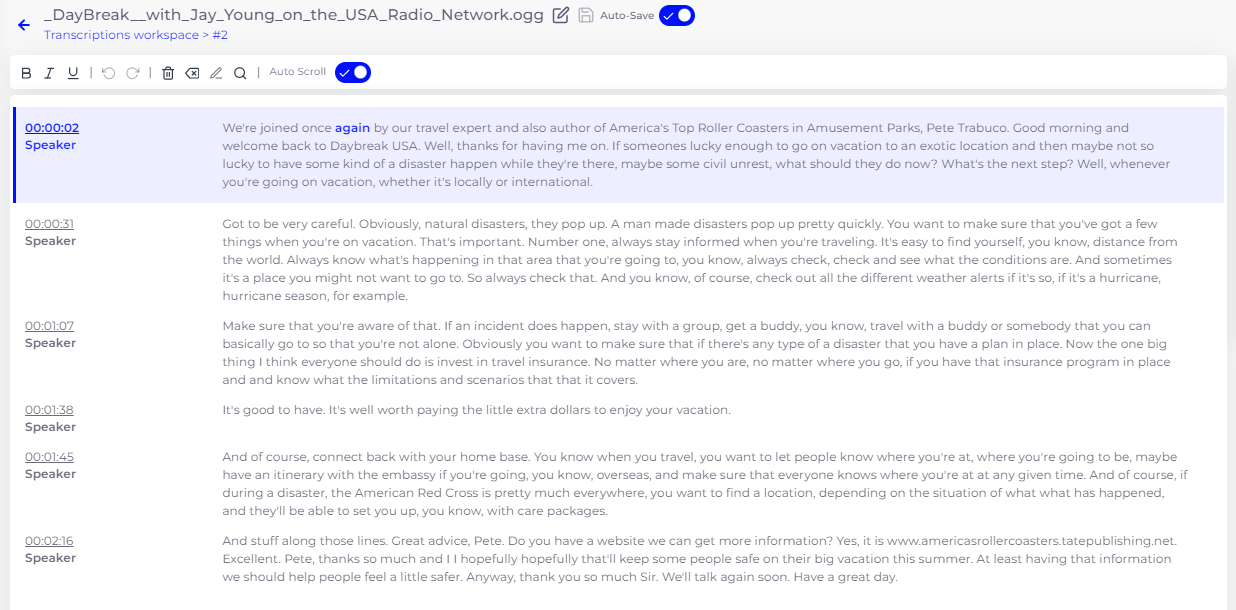
2. The transcribed text works like a regular text editor, like Microsoft Word. If you see something that needs fixing, simply click it, and change it. For example, in the file we uploaded, SmartDocumentor Cloud didn’t detect that the speaker changed, so we will press enter at the end of the second sentence to create a new paragraph.

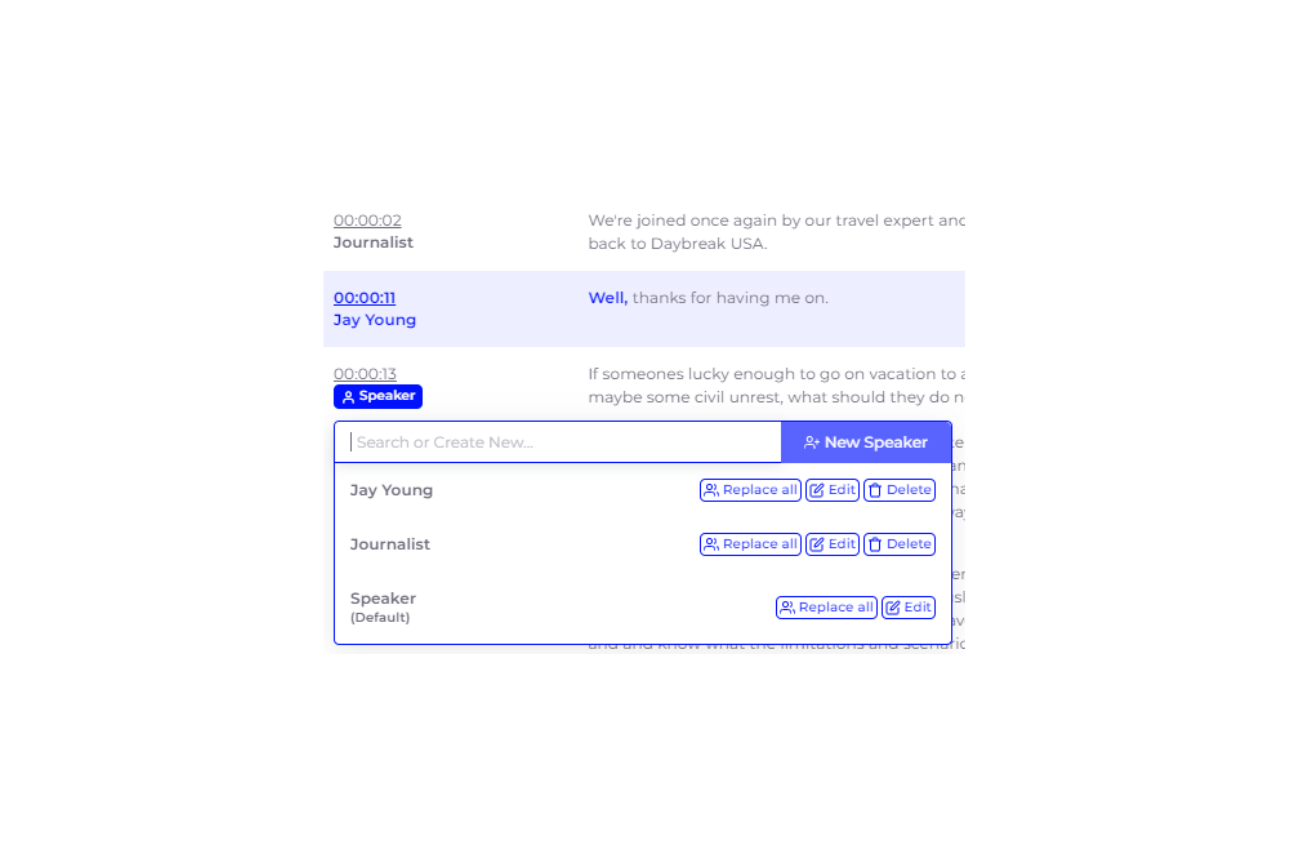
3. SmartDocumentor Cloud doesn’t detect different speakers (yet) so every paragraph will have “Speaker” as default. However, you can click it and create a new Speaker. This way, all you must do is click Speaker next to a paragraph and select one from the menu.
4. You can apply Bold, Italics or Underline to your transcribed text inside SmartDocumentor Cloud or export the transcribed text to Microsoft Word (.docx) and edit it there. You can find it under Options.
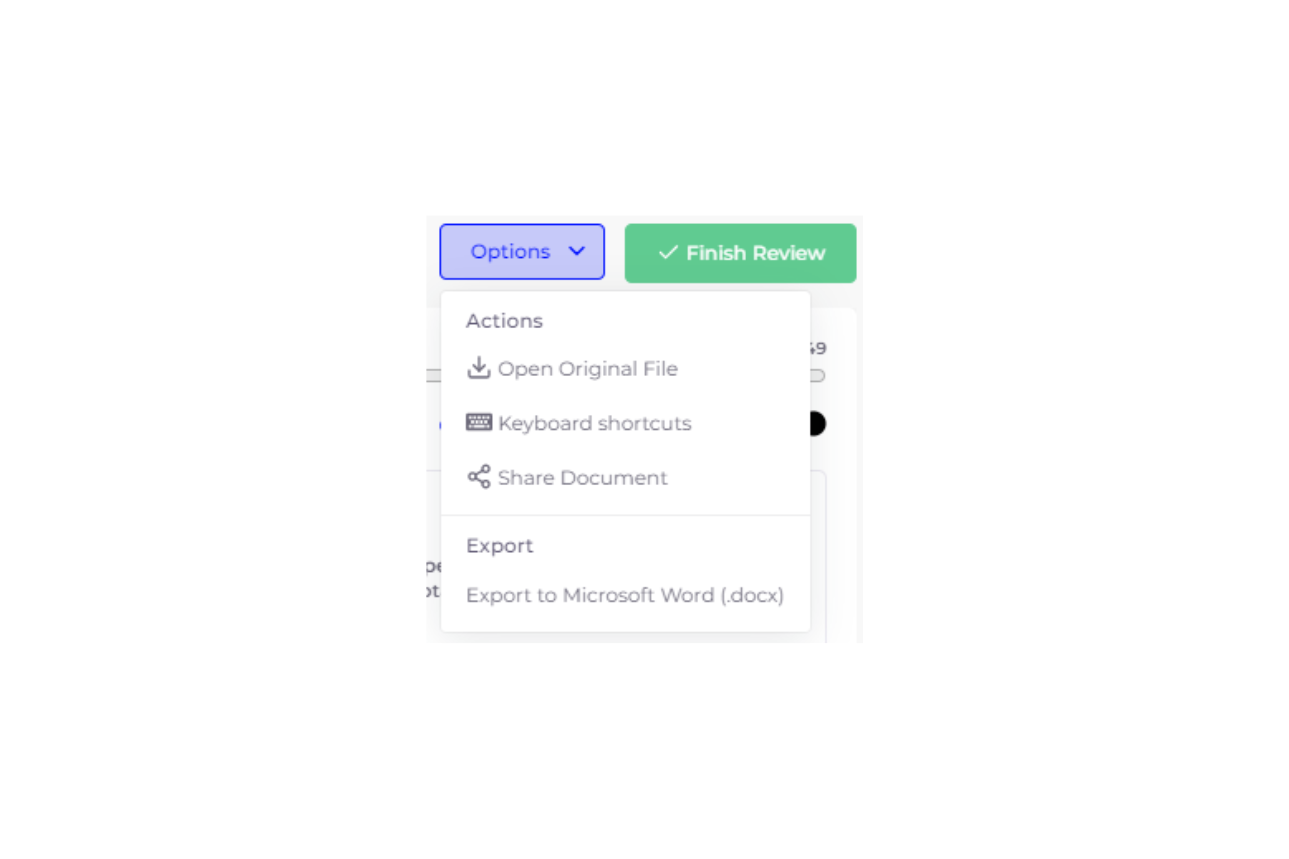
5. Once you’re done reviewing your text, you can click Finish Review. If you set up an export mechanism (step 3 of this tutorial), the file will automatically be stored at the location of your choice.
Conclusion:
SmartDocumentor Cloud offers a powerful solution for automating the transcription of audio and video files, saving time, reducing errors, and improving efficiency. We hope our solution is simple enough to use and this step-by-step guide fills in any gaps in the user experience. If you still have any questions about how to transcribe audio and video in SmartDocumentor Cloud or run into any errors doing it, get in touch with our team at support@devscope.net.

PowerBI Portal 101: everything you need to start
PowerBI Portal 101 is a thorough guide covering all aspects of DevScope’s Power BI report and dashboard sharing web tool. Click the article to learn how [...]
